Decal Application Instructions
How To Apply Car Decals & Window Stickers
Watch our quick video tutorial and learn how to apply vinyl car decals & window stickers. Our decals are easy to apply, just peel and stick on a clean dry surface.
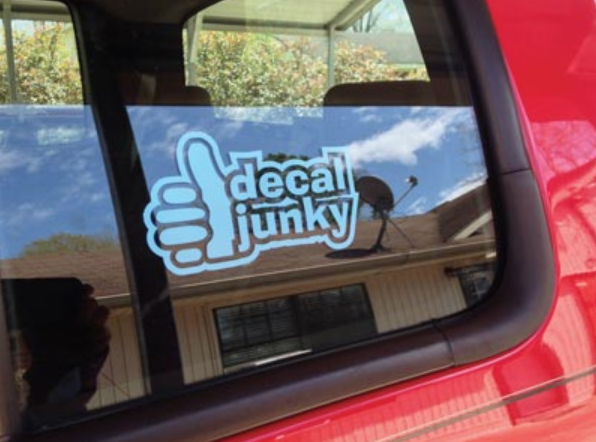
Please read the written decal application instructions below before attempting to apply the decals. Decals applied using these instructions will last for years. They are made using weatherproof sign vinyl that can be applied indoors and outdoors.
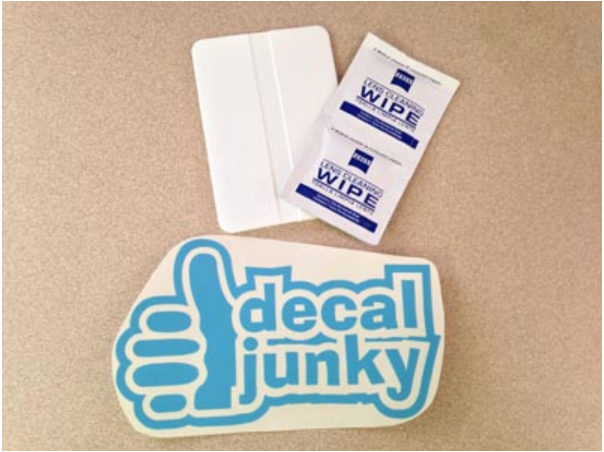
Step 1 - Gather Tools
Your decal will arrive sandwiched between a clear application tape and a paper backing. If you purchased a decal application tool kit, that will be included as well.

Step 2 - Prepare Decal
To ensure that the decal peels away from the paper backing and adheres properly to the application tape, lay the decal on a hard smooth surface, squeegee across the entire surface of the decal with firm pressure. You may also use the sharp edge of a credit card or rub firmly with your fingertips covering the entire surface.
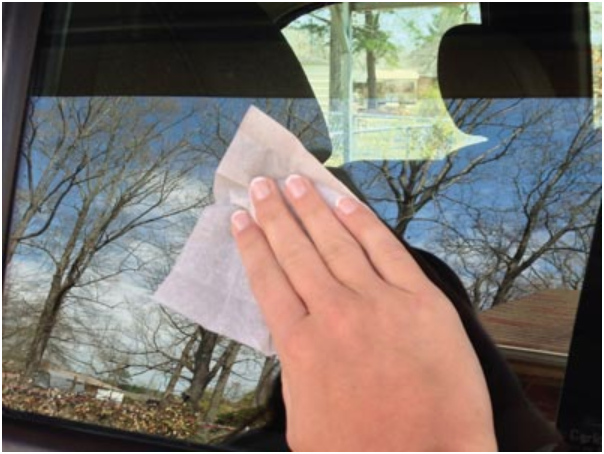
Step 3 - Clean Application Area
Clean the area where the decals will be applied using a soft cloth dampened with alcohol or use the glass cleaning wipes included in the decal application kit purchased from our website. This will remove any wax, residue, oil or dust particles that will prevent the decal from sticking. If the decal will be applied to a painted surface such as the body of a vehicle clean the area using a soft cloth and warm soapy water. Then wipe the area with a clean soft cloth dampened with alcohol and dry.
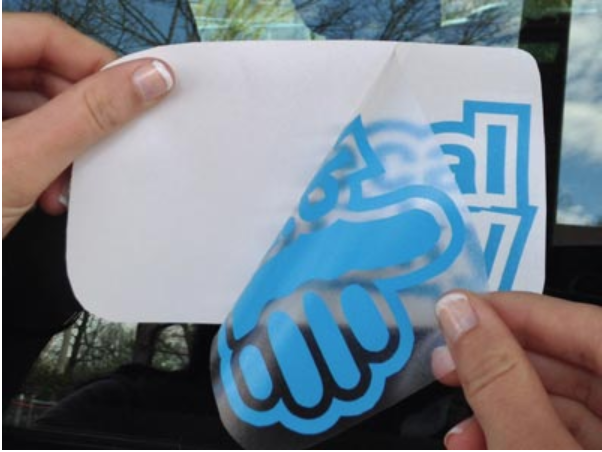
Step 4 - Remove Backing Paper
Carefully peel the application tape and decal away from the paper backing. If the decal does not peel away from the paper backing, repeat step #2. When you peel the application tape away from the paper backing the decal will adhere to the back of the application tape. The paper backing can be thrown away.
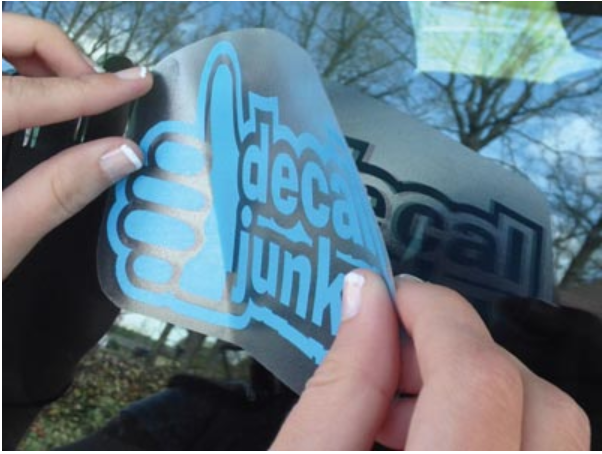
Step 5 - Begin Application
Hold the decal in position and stick the top or one side holding the other side up away from the surface.

Step 6 - Adhere Decal To Surface
Slowly rub or squeegee firmly across the surface of the decal using the application tool or the sharp edge of a credit card. The decals have a pressure sensitive adhesive so the harder you rub, the harder it sticks.
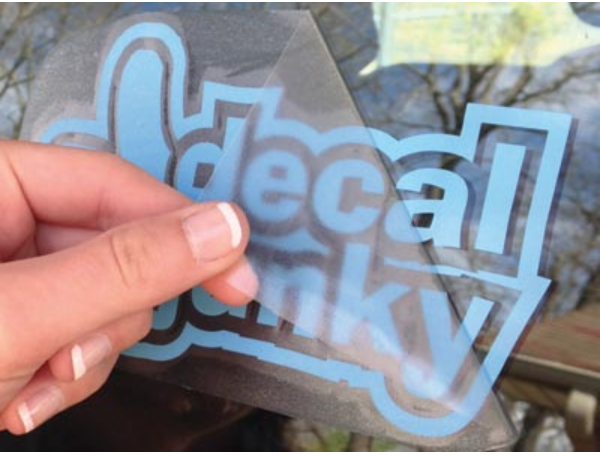
Step 7 - Remove Application Tape
Remove the application tape by pulling gently in a downward motion. If a part of the decal starts to come up away from the surface rub it back down onto the surface while the tape is still intact and press firmly, then proceed to remove the tape. Only the pieces will remain on the surface giving the appearance of being painted on.

Step 8 - Enjoy!
After the application process is complete, your decal will have a “painted on” look.
Note: The decals will not adhere to a surface that has been waxed. Remove all wax and residue with a cloth dampened with rubbing alcohol or denatured alcohol before application. After the decals have been applied, the surface can be waxed over. The wax will not damage the decal but will prevent it from sticking.
By default, the decals are cut for exterior application. We offer the option for interior window application.
The decals are cut using a sign grade vinyl that is durable and designed to withstand the elements. The decals will hold up well in an automatic car wash. If you use the pressure spray car wash do not apply a lot of pressure directly on the decal. The decals will not adhere to a surface that has been waxed but can accept wax after application. The decals can also accept a clear coat if needed.
Troubleshooting Decal Application and Removal: Problem:
My decal won’t peel off the paper backing.
Lay the decal face down on a hard flat surface and use a squeegee or the sharp edge of a credit card and press firmly across the surface of the decal. This will press the vinyl material onto the application tape so you can peel it away from the paper backing and apply your decal.
My decal won’t stick to the window or surface.
Make sure the surface is as clean as possible. Residue from car wash soap and wax, products like RainX and rainwater mixed with oil and gas residue from the road can all prevent your decal from sticking. We recommend cleaning the glass with rubbing alcohol or ammonia free window cleaner. Other surfaces can be cleaned with soapy water. Make sure the surface is completely clean & dry before you apply your decal.
Some decal pieces keep peeling up when I try to remove the application tape.
Use a squeegee or the shape edge of a credit card and press the decal firmly on the surface. It may help to leave the decal on the surface for several minutes before you try to remove the application tape. Peel the application tape away at an angle (see the photo in Step 7 above.) If some pieces don't adhere and start to come off with the transfer tape, push the application tape with the pieces back down on the surface and apply more pressure to the area, then continue removing the transfer tape.
There are bubbles in my decal.
First, make sure you have removed the clear application tape on top of the decal. Only the vinyl pieces should be left on the surface. Small bubbles under the vinyl material usually dissipate in a couple of days. If you have large bubbles in the vinyl material, you can use a needle to puncture the vinyl so the air can escape as you press the material down.
I need to remove my decal.
Decal Removal Instructions
How to remove a decal on a window.
1. Clean the decal or sticker and the area surrounding it. To clean the decals or stickers, you can use warm soapy water and a cleaning cloth. Clean the area around the decal or sticker properly where you want to remove so that no grit or grime interferes with decal’s adhesive-busting ability.
2. Warm it up. Using a hot hairdryer or heat gun this will help make the vinyl more flexible and help release the adhesive making removal easier.
3. Scrape up under the window sticker. When the decal or sticker is heated up, you can scrape up under the sticker with a flat edge razor blade or plastic scraper tool at an angle and begin to peel it away. Do not use a razor blade on painted surfaces.
4. If there is adhesive residue left, you can use window cleaner, soapy water or an adhesive remover from your local automotive or discount store. Please read all warnings and instructions carefully. Some adhesive removers can damage plastic and painted surfaces.
How to remove a decal from a painted surface such as the body of your vehicle.
1. Clean the decal or sticker and the area surrounding it. To clean the decals or stickers, you can use warm soapy water and a cleaning cloth. Clean the area around the decal or sticker properly where you want to remove so that no grit or grime interferes with decal’s adhesive-busting ability.
2. Warm it up. Using a hot hairdryer or heat gun this will help make the vinyl more flexible and help release the adhesive making removal easier.
3. Scrape up under the window sticker. When the decal or sticker is heated up, you can scrape up under the sticker using a plastic scraper tool while holding at an angle and begin to peel it away. Do not use a razor blade on painted surfaces. Once the vinyl is heated it becomes more supple and can be peeled off.
4. If there is adhesive residue left, you can use window cleaner, soapy water or an adhesive remover from your local automotive or discount store. Please read all warnings and instructions carefully. Some adhesive removers can damage plastic and painted surfaces.
